Why a Fitted Mouth Guard Provides the Best Protection

By: Dr. Elizabeth Eggert

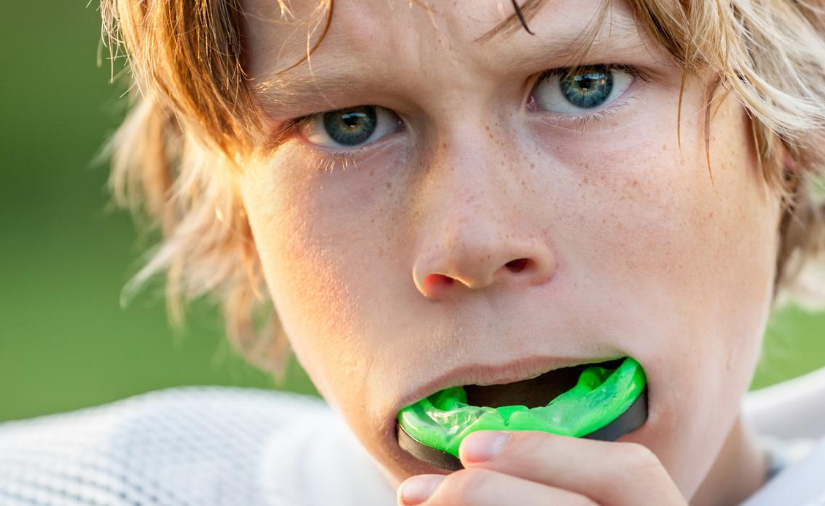
A fitted mouth guard is the best way to protect an athlete’s teeth and mouth area when playing sports throughout the year.

Dr. Jeff and Dr. Elizabeth always recommend to parents of our sports-playing patients that a custom-fitted mouth guard is the best way to protect their kids’ teeth, jaws and general health. This is especially important in traditional high-contact sports like hockey, wrestling, and football, but it’s also true in other sports like baseball and gymnastics in which an errant move may cause a dentofacial injury that is disastrous for the teeth or jaw.

Many athletes rely on the one-size-fits-all or boil-and-bite mouth easily found at sporting goods stores and online, and they are definitely an improvement over no protection.

However, the benefits of custom mouth guards are worth the investment. Your child has just one set of adult teeth, and keeping them intact should be your priority. The longer they can go in life without requiring dental reconstruction, the better. In addition, the cost of a custom set of mouth guards is far more economical than multiple dental visits.

Better Fit

When you get a custom mouth guard, it’s molded exactly to your child’s teeth and jaw. When you choose an off-the-shelf guard, it’s generally bulky and fits far from perfectly. It’s probably uncomfortable to wear and hard to speak around. As a result, kids tend to not wear them for the entire length of the game or competition or they play with them during competition rendering them ineffective.

In contrast, a custom-fit mouth guard is much more comfortable and easy to speak with. This seriously increases the likelihood that your kid will wear it for the duration of their athletic event.

Improved Breathing

One of the most common complaints kids have about one-size-fits-all mouth guards is that they interfere with breathing, especially during intense exertion. It’s no surprise that athletes object to this problem, because it’s hard to perform at your best when your respiration is impaired. Research indicates that custom mouth guards don’t interfere with breathing. In fact, some research suggests that custom mouth guards may actually improve athletic performance. When kids complain that they can’t breathe well while wearing a store-bought mouth guard, upgrade to a custom-made one

Better Protection

The American Dental Association strongly encourages athletes of all ages to wear mouth guards and reduce the risk of orofacial injuries. Studies support this. A 2018 meta-analysis established that mouth guard users are 82-93% less likely to suffer dentofacial injuries. A study of college athletes showed that custom mouth guards provide the best protection against injury while playing contact sports.

The ADA states that the most effective mouth guards share these qualities:

  • Cover the user’s teeth on one arch
  • Are properly fitted to the user’s mouth
  • Are accurately adapted to the user’s oral structures
  • Stay in place comfortably and securely

Stock mouth guards don’t meet these criteria, but custom mouth guards do.

Help your kids graduate into adulthood with a healthy, intact set of teeth. Please talk to Dr. Elizabeth or Dr Jeff about getting a custom mouth guard to protect your athletic offspring’s dentofacial health.

List Join

An Inside Look at the Zoom Whitening System for a Whiter Smile in 2022!

By: Dr. Elizabeth Eggert

Tooth whitening is a wildly popular component of dental care. Lots of people pursue dental whitening and bleaching options in their quests for a bright, attractive smile.

While there are many natural and healthy shades of tooth enamel, teeth can get yellowed and stained over time, even with the most dedicated dental hygiene. Some particularly troublesome darkening culprits include coffee, tea, red wine and smoking.

If you long for brighter, whiter teeth, you might want to join the multitude of people who are choosing tooth whitening. In fact, in 2017 over 39 million Americans utilized some kind of teeth whitener.

There are options for use at home such as strips, trays and toothpaste, but these options tend to show subtle results, and many users experience tooth sensitivity or temporary gum irritation as a result.

Professionally Administered Tooth Whitening

If you’d like to make a brilliant, noticeable difference to your teeth, talk to Dr. Elizabeth or Dr. Jeff about our fast, easy and effective Zoom Whitening. In a single two-hour appointment, we can make your teeth four to ten shades lighter.

Here’s how it works:

  1. We check your current shade as a baseline
  2. We prep your mouth for whitening
  3. We apply a layer of advanced whitening gel to your teeth
  4. We shine a blue LED lamp onto your teeth to accelerate the whitening
  5. We repeat this process three times in 15-minute intervals
  6. We verify with you that you’ve attained your desired shade
  7. We apply a post-treatment gel to help protect enamel and reduce sensitivity

In addition, we’ll send you home with customized whitening trays and a take-home whitening kit at no extra charge. With your kit, you can boost your brightness at home when needed to help maintain your new beautiful smile!

See a Brighter, Whiter Smile in the Mirror

Come to Eggert Family Dentistry if you want to see a lighter, brighter smile in the mirror. Choosing professional, proven whitening techniques is the best way to ensure a comfortable, successful experience with dazzling results.

We’re here to assist you with all aspects of your dental hygiene and dental aesthetics. Next time you’re in one of our chairs, ask us about whitening. We’ll be happy to describe the process in detail and offer you a professional opinion about the results you can expect. Call us today at 651.482.8412.

List Join

Keep Your Teeth Healthy Over the Holidays

By Dr: Elizabeth Eggert

We know you want to keep your teeth healthy every day of the year. It’s never fun to seek emergency dental care and it’s even more challenging over the holidays. You don’t want to be on a soft-food diet while everyone else is enjoying the holiday feast! So spend your quality time with your family, instead of with Dr. Elizabeth or Dr. Jeff, by following these tips to keep your teeth healthy over the holidays.

Never Use Your Teeth to Open Packages or Bottles

Opening a gift is supposed to be fun, not an invitation for a root canal or crown. Always keep the right tools handy for opening bottles and packages, and take a minute to find what you need instead of improvising with your teeth. Before you start the present-opening chapter of your holiday, gather some sturdy scissors and a utility knife. If you need to open a stubborn bottle, try pliers or another gripping tool.

Don’t Chew On Ice Cubes or Hard Candy

If you indulge in hard candy, let it dissolve slowly in your mouth instead of crunching it. Or better still, skip it or eat sugar-free versions for better dental health. Don’t chew on ice because it can crack or chip your teeth. Once again, it’s not worth a fleeting moment of satisfaction for a permanent impact on your teeth.

Never Crack Nuts with Your Teeth

You know it’s a bad idea to crack nuts with your teeth, right? Please don’t tempt fate, and always use a nutcracker. Yes, even for pistachios that haven’t split open properly. Using your teeth on a nutshell is a gamble that the nut will eventually win. Cracking a tooth is NOT worth it!

Skip the Chewy Treats

Chewy treats like taffy and caramel can pull out fillings. Resist the temptation, especially if you know you have lots of fillings or some precarious dental work that could suffer. Once again, not worth it if you end up hunting down a dentist on a holiday!

Wear a Mouth Guard

If you are prone to teeth grinding, make sure you wear your mouth guard diligently during the holidays. Many people find the holidays stressful, so stress responses like daytime or nighttime teeth grinding are exacerbated.

Quit Nail Biting

Nail biting is usually a stress-triggered behavior, and it’s bad for both fingernails and teeth. It’s linked to jaw problems, teeth grinding, clenching, and sensitive teeth. Try to quit this habit – it is the best holiday gift you can give yourself.

Here at Eggert Family Dentistry, we’re always happy to see you, but we’re the happiest when it’s for routine recare, not for sudden urgent dental treatments. Please enjoy your holidays while tending lovingly to your teeth, mouth, and gums, and we’ll see you at your next cleaning. Call us 651.482.8412 to set up your first recare appointment of 2022!

Not All Halloween Candy Affects Teeth the Same: What Is the Best and Worst?

By: Dr. Elizabeth Eggert

Halloween is right around the corner. As parents, we know the drill. Our kids put copious amounts of time into choosing the perfect costumes, rally their friends and map out plans of attack to collect the most possible candy in one evening. We’re caught somewhere between, “That sounds like the most epic Halloween ever, kids!” and “No child’s teeth can handle all that candy!”

In light of this pre-Halloween parent panic, we thought it would be helpful to take a little time to explain how different types of candy affect teeth differently.

Halloween candy worst offenders

Some candies are particularly problematic for dental health.

Hard sugar candy

halloween candy
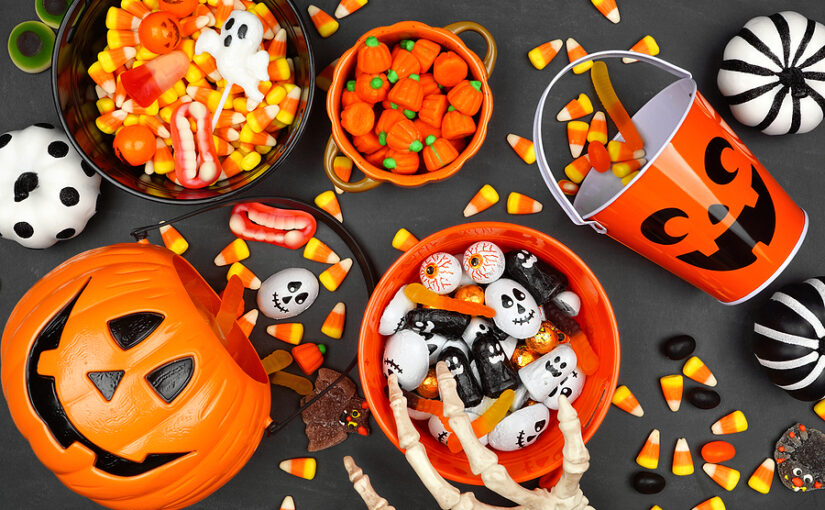
Candy on a stick, such as lollipops or rock candy, is meant to be enjoyed over time. Because it lingers in your mouth, it increases the production of saliva. However, instead of the saliva doing its job and rinsing bacteria out of your mouth, it only spreads the sugar around. Additionally, your mouth produces acid in an attempt to destroy the sticky sugar that then coats your teeth. The acid and sugar team up to break down tooth enamel and, with repeat exposure, can result in tooth decay.

Another threat to teeth from hard candy is the temptation to bite down on it, hence the candy we fondly know as “jawbreakers.” Biting down on hard candy can easily result in broken or chipped teeth and sometimes upset the jaw muscles so much, pain results.

Chewy candy

Just like candy on a stick, chewy candy lingers in the mouth. It gets stuck in your molars and between your teeth. If you’ve ever eaten Laffy Taffy, Sugar Babies or caramels, you know exactly what we’re talking about. Gummy candies or fruit snacks might seem like safer bets but they aren’t any better. They still contain sugar and get trapped in your molars and small crevices between your teeth.

Oh, and watch out for those delicious caramel apple suckers. Between the caramel, hard sugar candy and the fact that they’re meant to be savored, they can really wreak some dental havoc.

Sour candy

You might be wondering where sour candy fits into the picture. Warheads, Sour Patch Kids, Sour Skittles…kids LOVE sour candy and love to challenge themselves and their friends to eat large quantities of it or hold the sour candy in their mouths for long periods of time.

Unfortunately, sour candy attacks your teeth from two angles. Sour candy is both sweet and acidic. The sugar sticks to your teeth while the acid breaks down your enamel. Many sour candies are also sticky, further exacerbating the ill effects.

Does this mean your children can’t eat the hard and sugary, chewy or sour candies they rake in on Oct. 31? Not necessarily. However, armed with a little knowledge, you can avoid passing them out to the neighborhood kids and explain to your children why it’s important to limit their consumption of these sticky stinkers. Then remind them to brush and floss their teeth afterward to clean their mouths and remove any lodged sugar.

Halloween candy best choices

Sugar-free hard candy

Like its sugar-laden counterpart, sugar-free hard candy encourages the production of saliva which rinses bacteria from your mouth. However, sugar-free candy doesn’t cause the production of acid or stick to your teeth—a win for your pearly whites…and your sweet tooth!

Chocolates

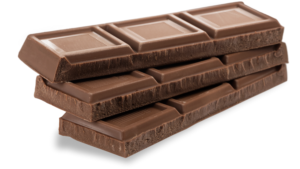
One of the most popular categories of Halloween candy are chocolates. While many have sticky centers like Twix, Rollos or Snickers, others like Hershey’s bars and Nestle Crunch dissipate quickly in your mouth, making them more dental-friendly than almost any other candy.

Sugar-free gum

While it’s not technically considered candy, sugar-free gum—much like sugar-free candy—helps your mouth produce saliva which rinses your teeth and helps ward against destructive bacteria. If you’re looking for a healthy option to hand out at the door this year (and don’t want to be the neighbor handing out mini bags of baby carrots!) consider giving out packs of sugar-free gum. Almost all kids love to chew gum, it’s allergen-friendly and will help cleanse their mouths from all the sugary, sticky, sour madness.

If you haven’t already, give us a call at 651.428.9691 to schedule your family members’ recare visits. Dr. Elizabeth, Dr. Jeff and our hygienists are here to help you keep your teeth clean and enjoy a healthy smile for life.

At What Age Should I Schedule My Child’s First Dental Visit?

By: Dr. Elizabeth Eggert

There’s a lot to keep track of as a new parent. Don’t let your baby’s dental health fall through the cracks! Your baby’s first tooth probably won’t erupt until they are close to six months old, but it’s never too early to get their first Eggert Family Dentistry visit on the calendar.

Baby teeth are important too!

We believe that “an ounce of prevention is worth a pound of cure” and we know that tooth decay can affect any teeth above the gumline. That’s why Dr. Elizabeth and Dr. Jeff and the American Academy of Pediatric Dentistry recommend that your baby have their first dental visit six months after their first tooth erupts or definitely by the age of 1.

Baby teeth have several important jobs and require the same level of care and vigilance as adult teeth.

Baby teeth are responsible for:

  • Helping children chew properly
  • Holding space for adult teeth
  • Speech development

What will we discuss at my child’s first dental visit?

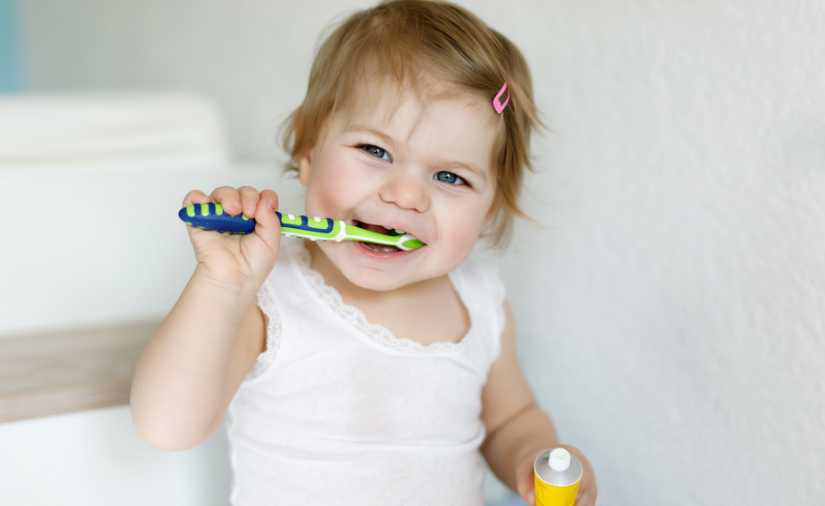
When you bring your baby in for their first dental visit, Dr. Elizabeth or Dr. Jeff will take a peek in their mouth and check all erupted teeth to make sure they’re healthy. Then they will discuss basic baby and toddler oral care, address the negative effects of sippy cups, pacifiers and thumb-sucking, tell you what dental milestones you can anticipate and advise you on how your baby’s nutrition impacts their oral health. Dr. Elizabeth or Dr. Jeff will also give you follow-up instructions so you know when to come back for your baby’s next visit and what to do in the meantime.

How do I prepare my child for their first dental visit?

If you’re proactive and your child’s first dental visit happens during their first year of life, they may not have stranger danger yet. This is a huge advantage and can set you up for a successful initial visit. If your child is a bit older, they may be warier of strangers and feel unsettled in a new environment.

To prepare your child for their first visit, you can:

  • Look online or go to your local library to find books or videos that help young children learn about brushing and caring for their teeth and visiting the dentist.
  • Talk positively about the dentist office and your child’s upcoming visit. Your positivity is contagious!
  • Bring along their favorite blanket or stuffed animal. A little dose of familiarity can provide them with comfort in this new environment.
  • Incentivize. Tell them about the prize they’ll get to pick out or offer to take them to their favorite park after their visit.
  • If your child is a little older and hasn’t had the opportunity to visit the dentist yet, bring them along with you to your next visit. This will help familiarize them with the sights and sounds of the dentist office. They will also be able to watch as Dr. Elizabeth or Dr. Jeff and one of our hygienists clean your teeth and examine your mouth.

Our team at Eggert Family Dentistry love working with children and we know good oral health starts young. If there’s anything we can do to help make your child’s first experience at our office a success, please let us know in advance! To schedule your child’s first appointment, call our office at 651.482.8412.

Back-to-School Oral Hygiene Routine for Kids: A Helpful Checklist

By: Dr. Elizabeth Eggert

Ahhh, the lazy days of summer. For most Midwesterners, this means swimming, boating, beaching and vacationing while enjoying late-night campfires and gooey s’mores. But we also know that, if we don’t think and plan ahead, the transition from summer into fall is rocky.

At Eggert Family Dentistry, we want to lighten your load a bit. As summer fades away into fall, save yourself stress by looking through our back-to-school oral hygiene checklist for your child!

Establish your school-year dental routine

  • Buy your child a new toothbrush, a tube of fluoride toothpaste, floss and mouthwash
  • Reiterate the importance of brushing and flossing at least twice each day
  • If your child is small, let them know where brushing and flossing will fit into their daily routine
  • As parents, make sure to help your children (age 8 and under) brush and floss thoroughly each time
  • Ask older siblings to set a good example by showing younger younger siblings how to brush and floss
  • Create a star chart or other reward system for young children to encourage daily oral hygiene

Put together a school dental kit

  • Check the school’s gum policy and, if it’s allowed, give your child a pack of sugar-free gum to chew after lunch to help clean their teeth
  • Get your child a water bottle they can take to school and encourage them to sip on water throughout the day to cleanse their mouth and keep their teeth clean

Shop for healthy food for lunches and snacks

Great choices include:

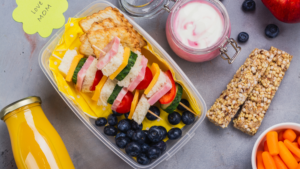
  • Crunchy foods like carrots, celery and apples; limit citrus fruits which erode enamel quickly
  • Salad greens with crunchy, raw vegetables and a low-sugar dressing
  • Foods high in calcium and phosphorus such as cheese, yogurt and nuts
  • Whole-grain bread/sandwiches with natural nut or seed butter or nitrite-free deli meat and cheese
  • Miniature water bottles or white milk for their thermos

If your child has braces…

  • Put a travel toothbrush, a small tube of fluoride toothpaste, a container of floss and a container of dental wax in a small zipper bag and encourage them to brush their teeth after lunch
  • Brainstorm a list of healthy, low-sugar, braces-friendly snack and lunch options

Schedule your child’s fall recare visit

At your child’s visit, we will thoroughly clean their teeth, check for signs of cavities, monitor the need for braces and evaluate the status of their wisdom teeth.

If your child will be playing contact sports this school year, ask us about custom mouthguards!

We hope this checklist helps you with your child’s back-to-school oral hygiene routine. Call Eggert Family Dentistry today to schedule your child’s fall recare visit at 651.482.8412!

The Seattle Protocol – Tom’s Story

By: Dr. Elizabeth Eggert

How Did This Start?

Tom’s journey began in 2014 when he came to us as a new patient looking to improve his oral health and the appearance of his teeth. During his comprehensive exam, Dr. Elizabeth found the main areas of concern to be the excessive wear, erosion and fracturing of Tom’s teeth. Dr. Elizabeth recommended Tom go through the records process (you can learn more about the records process here) and based on the information gathered during that process, she recommended a full-mouth reconstruction to address his uneven bite and rebuild his broken teeth. Throughout the process of reconstruction, it became clear that the amount of force in Tom’s bite was putting too much pressure on even his temporary crowns, which resulted in the temporaries cracking or falling out on more than one occasion. Dr. Elizabeth was concerned that even after completing the full mouth reconstruction, Tom would have underlying issues. Given Tom’s other symptoms, including difficulty breathing through his nose, dry mouth and use of a CPAP machine, Dr. Elizabeth recommended Tom complete the Seattle Protocol to help address his airway patency.

Tom Before

What Was Involved?

The Seattle Protocol is a six-step process that helps patients with symptoms of sleep-disordered breathing and other conditions determine whether a compromised airway is contributing to their ailments. Each step builds upon the last, but patients don’t necessarily need to complete the entire process as the purpose of the protocol is to determine the phase that provides the best relief of symptoms. You can learn more about the Seattle Protocol and each of the steps here. Throughout the process, Tom noticed improvements in his symptoms such as dry mouth, decreased clenching and grinding, and less waking throughout the night.

What Have Tom’s Results Been?

After completing five of the six steps of the Seattle Protocol, Dr. Elizabeth fabricated a sleep appliance for Tom to continue to improve his airway patency, reduce his bruxism and help him sleep better. Tom has now been using his sleep appliance for over a month and says the results so far have been great! He’s noticed less clenching and jaw pain and experienced an overall improvement in his sleep. Tom said that going through the Seattle Protocol helped him better understand the connection between his sleep and airway issues and he appreciates Dr. Elizabeth’s thorough explanation and care throughout each stage.

Tom After

Google Review

What is the Seattle Protocol and How Does it Help Pinpoint Airway Obstructions?

By: Dr. Elizabeth Eggert

When a patient with symptoms of airway issues first comes into our office, we often recommend the Seattle Protocol. This six-step method helps us identify where the issue lies by pinpointing which jaw positioning alleviates our patient’s symptoms. This allows us to create a custom night appliance for our patient that opens up their airway and curbs any inflammation or damage to the teeth, jaws or soft tissue. It also helps ward off serious systemic issues like high blood pressure, stroke or heart attack.

Before you embark on the Seattle Protocol, we may suggest an at-home sleep quality screening device or a sleep study so we solidify our starting point.

Seattle Protocol Step 1: Nose Breathing and Mouth Taping

The first step in the Seattle Protocol is to gently train your body to breathe through your nose, not your mouth. Breathing through your mouth during sleep can lead to snoring and a dry mouth. The Seattle Protocol encourages nose breathing by adding a strip of paper tape vertically across the center of your lips. The light adhesive of the tape keeps your lips together but is easy and painless to remove.

Step 2: Temporary Splint for Lower Jaw and Mouth Taping

Once you’ve adjusted to the mouth taping, the second step of the protocol adds a temporary splint for your lower jaw while you sleep. Adding this splint increases the vertical dimension of your jaw and allows more airway space.

Step 3: Temporary Splint for Lower Jaw with Lower Jaw Pulled Forward and Mouth Taping

If adding the lower splint only isn’t giving you the restful sleep you deserve, we move onto the next stage of the protocol. In this step, we add an element that pulls your lower jaw forward. This realigns your jaw and increases your airway space not only vertically, but horizontally as well. This also can give your tongue more of the space it requires.

Step 4: Temporary Splint for Lower and Upper Jaw with Mouth Taping

With all steps of the Seattle Protocol, if you aren’t getting relief from the previous step, we move on. In this step, we remove the forward jaw posturing component and add a splint for your upper jaw. You then go to sleep with splints on your upper and lower teeth and your jaw is free to move. This stage allows for additional vertical height, opening up your airway, but without restricting the jaw muscles into any one strict position.

Step 5: Temporary Splint for Lower and Upper Jaw with Lower Jaw Pulled Forward and Mouth Taping

If you need to continue in the protocol, step five again adds a horizontal component by linking the upper and lower splints together and moving the lower jaw forward. The intent, as always, is to continue to open your airway more and more.

Step 6: Temporary Splint for Lower and Upper Jaw with Lower Jaw Progressively Pulled Forward and Mouth Taping

If you still aren’t getting that good night’s sleep, we move to the final stage of the Seattle Protocol. In this stage, we keep moving your lower jaw forward, incrementally, until you feel well-rested.

In summary, after the initial two weeks of nasal breathing therapy and sleeping for 2-3 nights with each temporary night guard, once you experience relief of symptoms, we stop the protocol. This helps us identify which splint appliance/positioning alleviates the airway obstruction and allows us to fabricate your custom night appliance.

The further you progress through the steps in the protocol, the more severe your obstruction. If you progress into steps 4, 5 or 6, we may discuss the possibility of oral surgery to help you achieve optimal results.

If you’re concerned that you or your loved ones are dealing with sleep-disordered breathing, schedule an appointment with Dr. Elizabeth or Dr. Jeff by calling our office at 651.482.8412. Both Dr. Elizabeth and Dr. Jeff have the knowledge and experience to walk you through the Seattle Protocol and the best next steps.

Your healthy future starts today.


Confused by the Process? Learn How Sleep Apnea is Diagnosed

By Dr. Elizabeth Eggert

Do you deal with snoring, gasping for air in your sleep, a dry mouth, headache in the morning or daytime fatigue? Sleep apnea could be the culprit. It’s important to begin by making an appointment with Dr. Elizabeth or Dr. Jeff as well as with your primary care physician. Sleep apnea can be life-threatening and should always be carefully investigated.

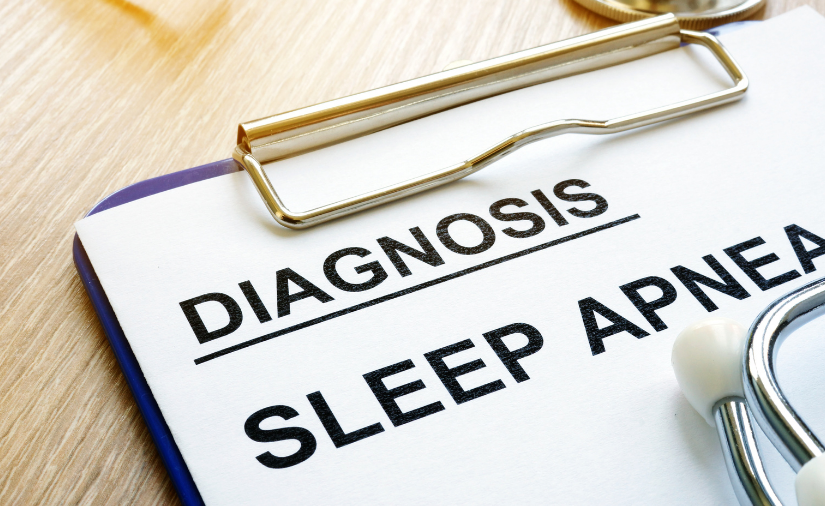
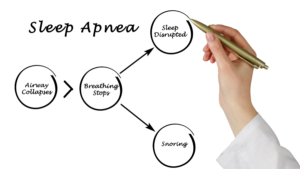
The first time we see you for sleep apnea symptoms, we will perform an assessment for signs of structural abnormalities or any physical issues that could be contributing to airway obstruction. This could include an enlarged tongue or tonsils, a small jaw or a large neck.

If your primary care doctor is concerned that sleep apnea is an issue for you, they will refer you to a sleep specialist. A board-certified sleep specialist will evaluate you by performing an overnight sleep study. This will give them more insight into the severity of the situation and help them determine the best course of treatment.

There are two different types of sleep studies your sleep specialist may recommend: a polysomnogram test or a home sleep apnea test.

Polysomnogram test:

A polysomnogram test is a sleep study, performed in a sleep lab, that helps diagnose sleep-related conditions.

During your night at the sleep lab, you will be hooked up to equipment that will monitor your heart, lungs and breathing patterns, brain, general movement and oxygen levels while you sleep. In some cases, your sleep specialist will let you sleep all night long. If your physician detects signs of sleep apnea, they will more than likely wake you up in the night and hook you up to continuous positive airway pressure, or CPAP. A CPAP machine has a mask that covers the nose and/or mouth, that is connected to a tube and the base of the machine and that delivers continuous air pressure all night long, allowing the airway to remain open.

When your sleep specialist tests the CPAP machine on you, they will watch how it improves your airway obstruction and will calibrate it for your specific needs.

Home sleep apnea test:

In some cases, your sleep specialist will give you an at-home sleep apnea test kit that monitors and tests breathing patterns and sleep disturbances. This can be a good solution for individuals who find the polysomnogram test cost-prohibitive or difficult to coordinate. However, if sleep apnea is suspected from the results of your home test, your doctor may still recommend a visit to the sleep lab for further testing.

After you receive your results from your sleep specialist, if they indicate the presence of sleep apnea, we recommend you contact our office to set up another appointment. At this appointment, Dr. Elizabeth or Dr. Jeff will walk you through our records process.

During this comprehensive analysis, they will determine if a sleep apnea appliance would help alleviate your symptoms of sleep apnea. If they decide it would be helpful, Dr. Elizabeth or Dr. Jeff will confer with your general practitioner, sleep physician and lab to design a sleep apnea appliance, custom fit for you, that supports your jaw in the position that best improves your airway, often a forward position.

We may also recommend that you adjust your sleeping positioning or we may refer you to an orthodontist for another consultation if we believe that braces or other orthodontic treatment could help better keep your airway open.

If you’re experiencing sleep apnea symptoms, reach out to us at 651.482.8412 to make an appointment with Dr. Elizabeth or Dr. Jeff. They will perform a thorough assessment and collaborate with your other physician(s) to find the best treatment plan for you.

Sleep Apnea and Oral Health Share A Few Primary Connections

By: Dr. Elizabeth Eggert

Obstructive sleep apnea (OSA) is a condition that must be taken seriously. Obstructive sleep apnea is an airway blockage that occurs when, during sleep, muscles in the back of the throat relax and/or the tongue and surrounding tissues migrate back into the throat, obstructing the airway.

Not only can sleep apnea cause fatigue, headaches and memory loss but it can also lead to even more serious health issues such as hypertension, heart failure and stroke.

Many people don’t understand what causes sleep apnea and how it affects oral health. We’re going to take a few minutes to unpack some of these connections.

Risk factors for sleep apnea

When you come in for an appointment, we look for signs or symptoms that could be considered “red flags” for airway conditions, including sleep apnea. Dr. Elizabeth or Dr. Jeff perform an assessment to see if you have any of the following risk factors among many others:

  • Over 40 years of age
  • Obesity
  • Large tongue or tonsils
  • A large neck
  • A small jaw

If we think you might be dealing with an airway issue like sleep apnea, we’ll ask you if your loved ones complain that you snore or gasp for air when you sleep. We’ll ask you if you deal with insomnia or daytime drowsiness. Do you wake up with a headache or a dry mouth? Do you have nasal or sinus problems?

We will also look for signs of TMD, bruxism or dry mouth, all of which can be connected to OSA.

TMD goes hand in hand with sleep apnea

Did you know that, in 52% of obstructive sleep apnea cases, a person also struggles with temporomandibular disorder or TMD?

TMD occurs when the temporomandibular joint (TMJ) doesn’t function properly. When the joint is irritated, chewing and talking can be mildly to moderately painful.

So why do sleep apnea and TMD often occur together? When a person is deprived of oxygen during sleep, their body will compensate in unconscious ways. In many cases, their jaw muscles clench and release or grind the jaw around to gain more airway space. When sleep apnea is left untreated, this jaw motion becomes habitual and can cause TMD or even deterioration of the jaw joint itself.

Bruxism goes hand in hand with sleep apnea

Bruxism is another condition that is often present alongside obstructive sleep apnea. Often intertwined with TMD, bruxism describes a condition caused by the clenching or grinding of teeth. It occurs unconsciously during sleep and can be another way a person’s body compensates for an airway obstruction.

Symptoms of bruxism include broken, cracked, chipped or worn teeth. Because the clenching and grinding of teeth cause tension in a person’s head, jaw and muscle discomfort are commonly present.

Of the 31% of adults who deal with bruxism, at least 25% of them also battle OSA.

Sleep apnea leads to mouth breathing

As we already stated, sleep apnea is an airway obstruction often caused by soft tissues that move towards the back of the mouth during sleep. In addition to clenching and contracting your jaw muscles in response, a person will typically also mouth breathe in an attempt to get more oxygen.

Mouth breathing leads to snoring but it also leads to other, more serious oral consequences.

Saliva plays an important role in rinsing food and harmful bacteria out of our mouths. When a person breathes through their mouth, it becomes dry and becomes a haven for food particles and bacteria. Without this natural “rinsing” function, plaque easily grows under the gumline and can cause tooth decay, gingivitis and in extreme cases, periodontal disease.

If you’re experiencing symptoms of sleep apnea or related conditions, Dr. Elizabeth or Dr. Jeff would love to see you in our office. They can evaluate your situation, determine which factors are present and, if they see evidence of sleep apnea, refer you to your primary doctor who may refer you to an ENT or sleep specialist. Then Dr. Elizabeth or Dr. Jeff will partner with these specialists to determine the best courses of action to help alleviate sleep apnea and any peripheral issues and restore your health. Schedule your appointment by calling our office at 651.482.8412!